
My WalkAbout is an older model that had separate passive and active inputs. The last service I had, they updated the circuit to a newer version that uses a toggle switch for a single input. More wear and tear on a single plastic jack now, but it's holding so far.
Some TLC for My Mesa WalkAbout
My main amp for the past 20 years has been a Mesa WalkAbout Scout 1x15 combo. It’s a very versatile amp. The three band perimetric EQ is great for dialing out feedback for double bass. I’ve only had to have it serviced once about ten years ago when it started making a cracking sound. Well, it started cracking again last week.
Mesa Boogie amps are notorious for being difficult to work on. Components are often layered on top of one another other, and the chassis are densely packed. This one is a little tight, but it seems fairly reasonable at a glance. I live about 90 minutes away from the Mesa/Boogie factory in Petaluma, so taking it in for service is really not a big deal for me. Actually, it’s kind of a joy, being that it’s across the street from Lagunitas and HenHouse Brewing. It’s the holidays, though, and I have a few more shows coming up before the end of the year. I’m not sure how quickly they’d have been able to turn it around, and I had a few weeks between gigs, so I figured I would take a crack at it.
The WalkAbout has a tube preamp section with two 12AX7s. The first stage is fairly standard and boosts the signal through a bass, mid, and treble tone stack with a gain control. It then goes through a three band parametric EQ driven by TL072 op amps. The second 12AX7 then comes in as a driver stage for the solid state power section after the parametric EQ section. The crackling issue is very reminiscent of plate resistor failure. I figured that would be an easy place to start (after testing tubes and cleaning tube sockets). Easy relative to Mesa Engineering engineering, of course.
According to the schematic (that a previous tech was kind enough to leave with me), R4 and R10 are the suspect 100k plate resistors for the first and second preamp stages. Mesa labels the components on their circuit boards underneath the components so you can only read them when they aren’t installed. The traces for the tube socket are also on the bottom of the board, so you to have to pull it to know for sure which resistor does what. We have to pull the board to swap them out anyway, so it’s not that big of a deal.
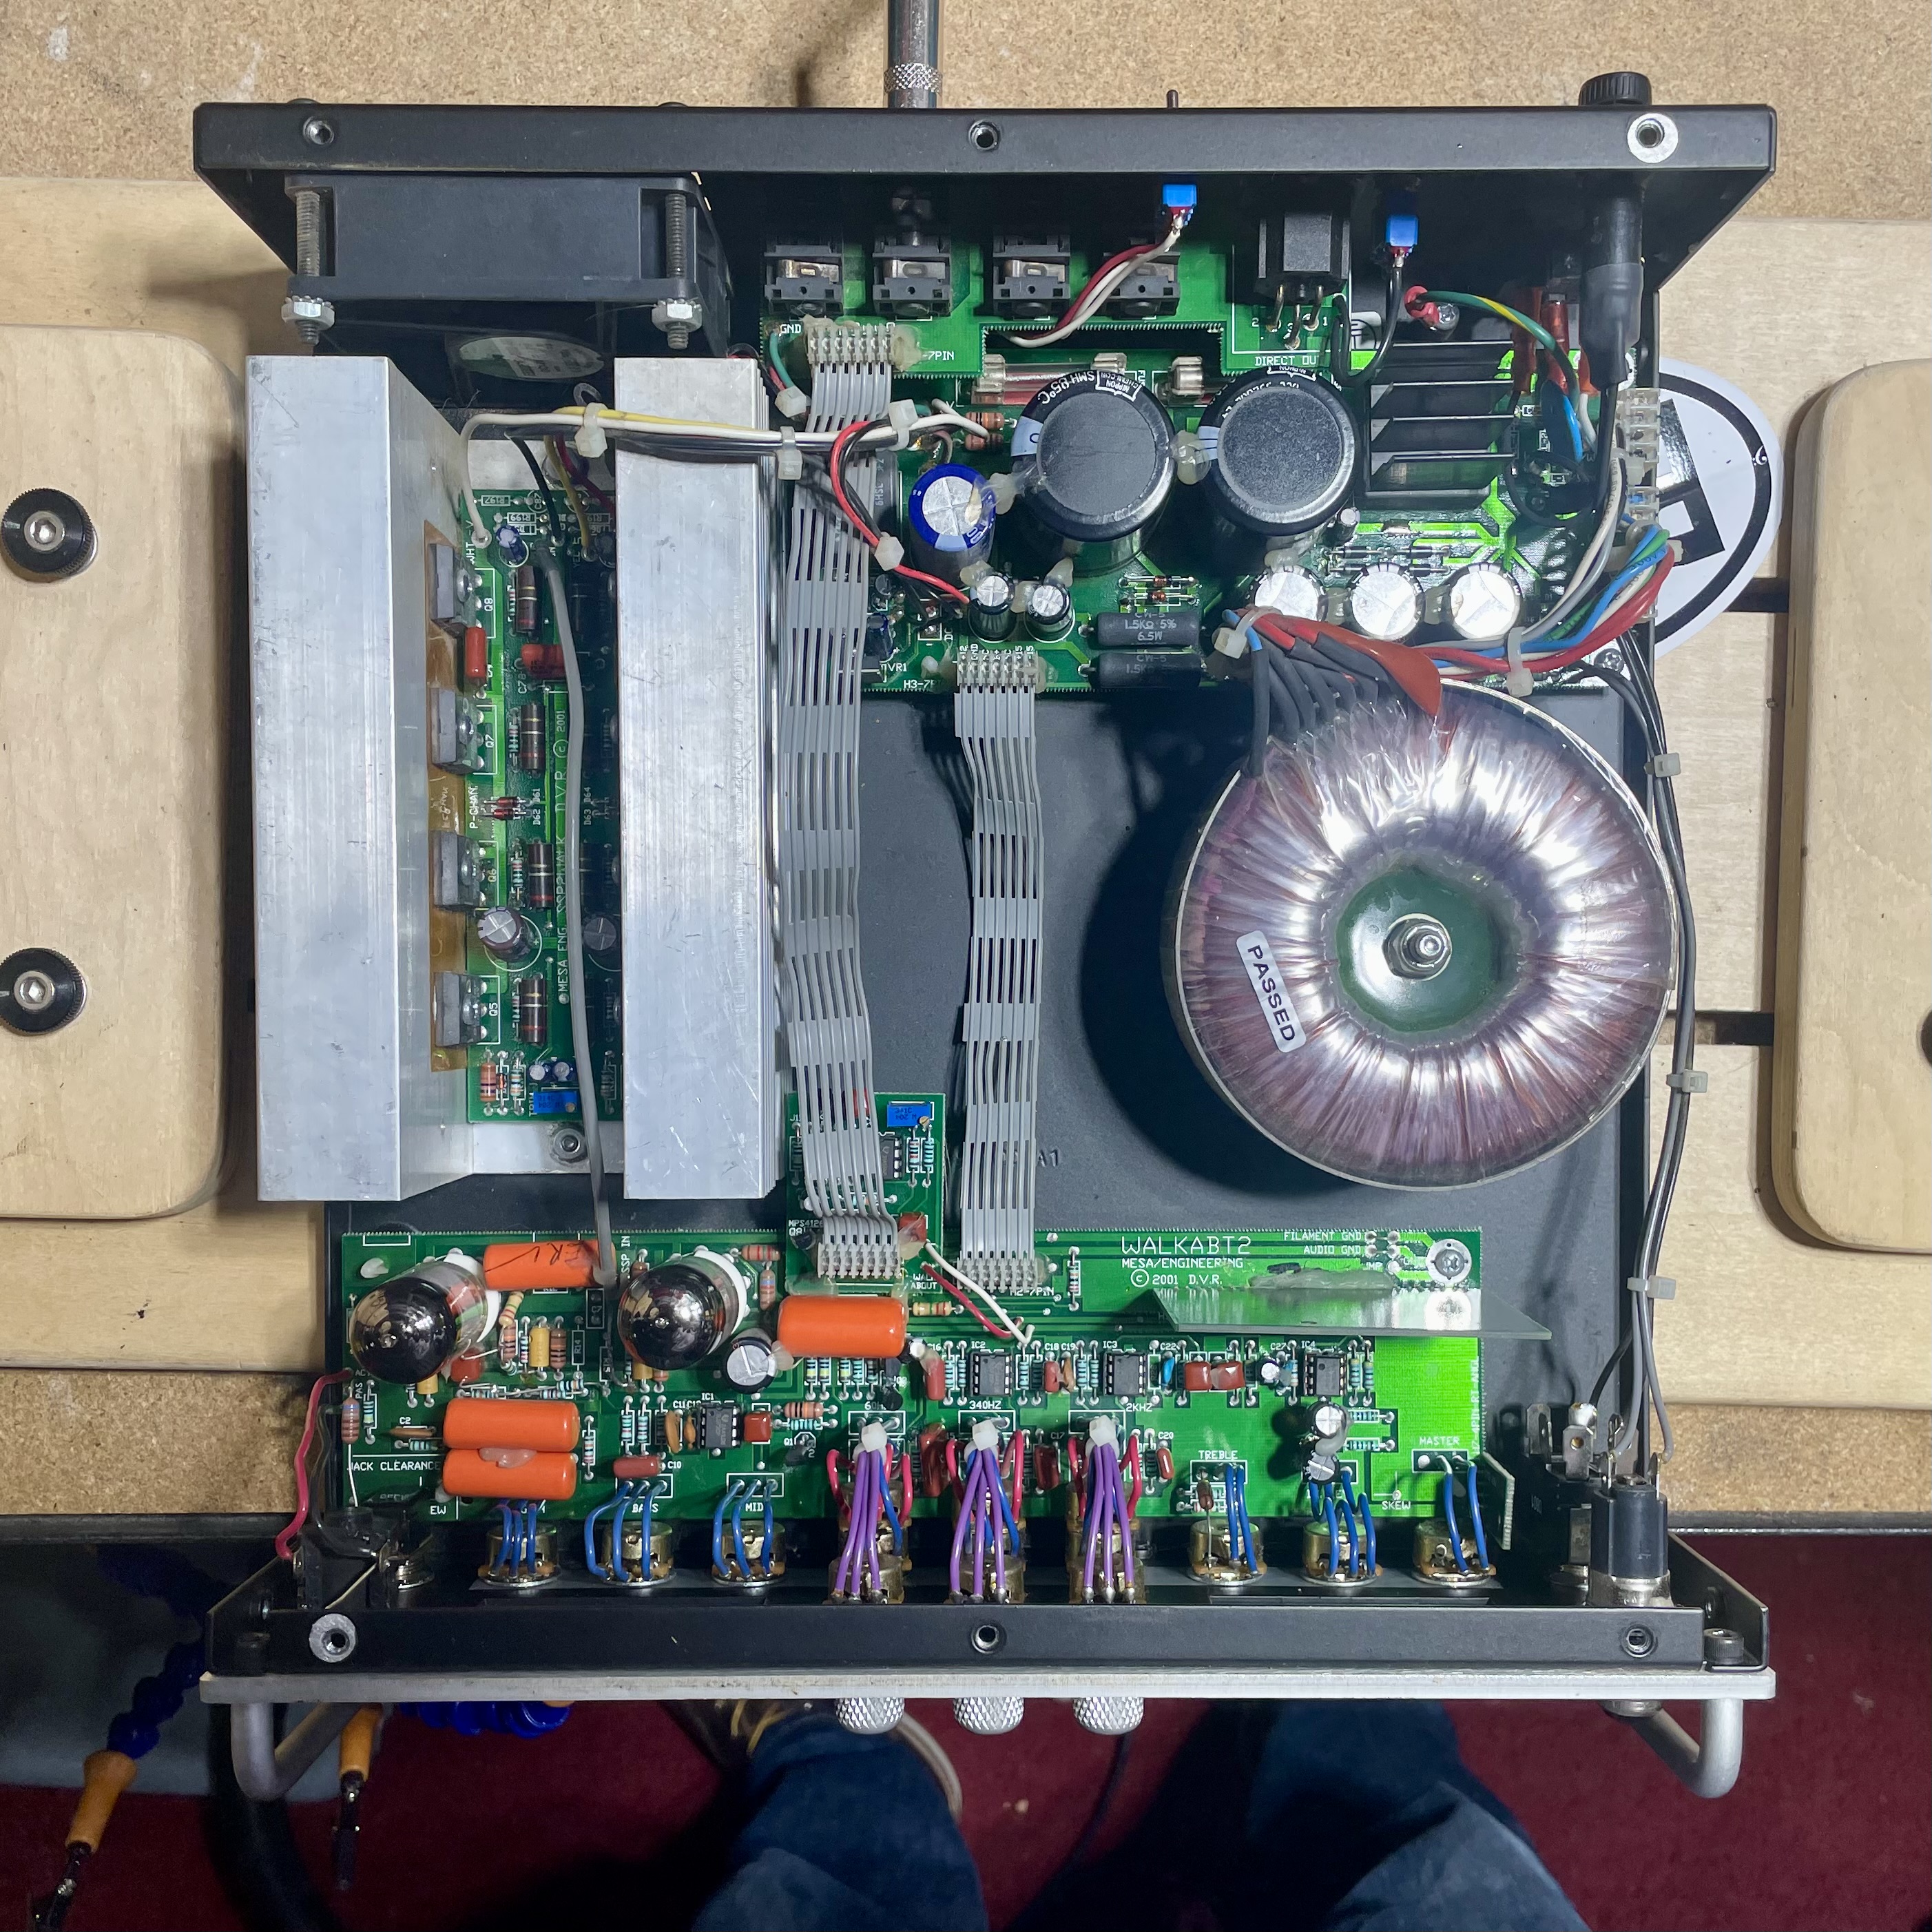
Components are tightly packed, but it is workable. I do appreciate that they wire the pots to the board. We are focusing our attention to the left side of the preamp board in the bottom of the photo.
Like most modern PCB amps, you have to disconnect all the pots and jacks to pull the chassis. The WalkAbout, though, has an unusually thick aluminum faceplate that needs to be removed in order to get a socket wrench around any of the nuts.
This panel is attached with two small machine screws and two front-facing pull handles that help protect the controls. Only one allen screw for each handle is accessible, though, as the bottom screws are obscured by the PCB. The trick is to remove the bolts at the top of the handles, then spin the handles themselves to unscrew them from the bolts. Thankfully the clearance between the pots is enough to allow the handle to pass between, provided you remove the knobs first.
With the handles and two bolts under the EQ controls removed, the only thing holding the panel on is the jewel lamp. The edges of the face of the chassis are folded over, making it impossible to get a wrench in there. The only real way to remove it is to desolder the leads and use a 2" x 13/16" socket. Any smaller and it won’t clear the body of the lamp internally. Any larger and you’ll run into the transformer behind it. Thankfully, Mesa wired the pots to the PCB, making it very easy to pull (once you get past the hell of removing the faceplate).
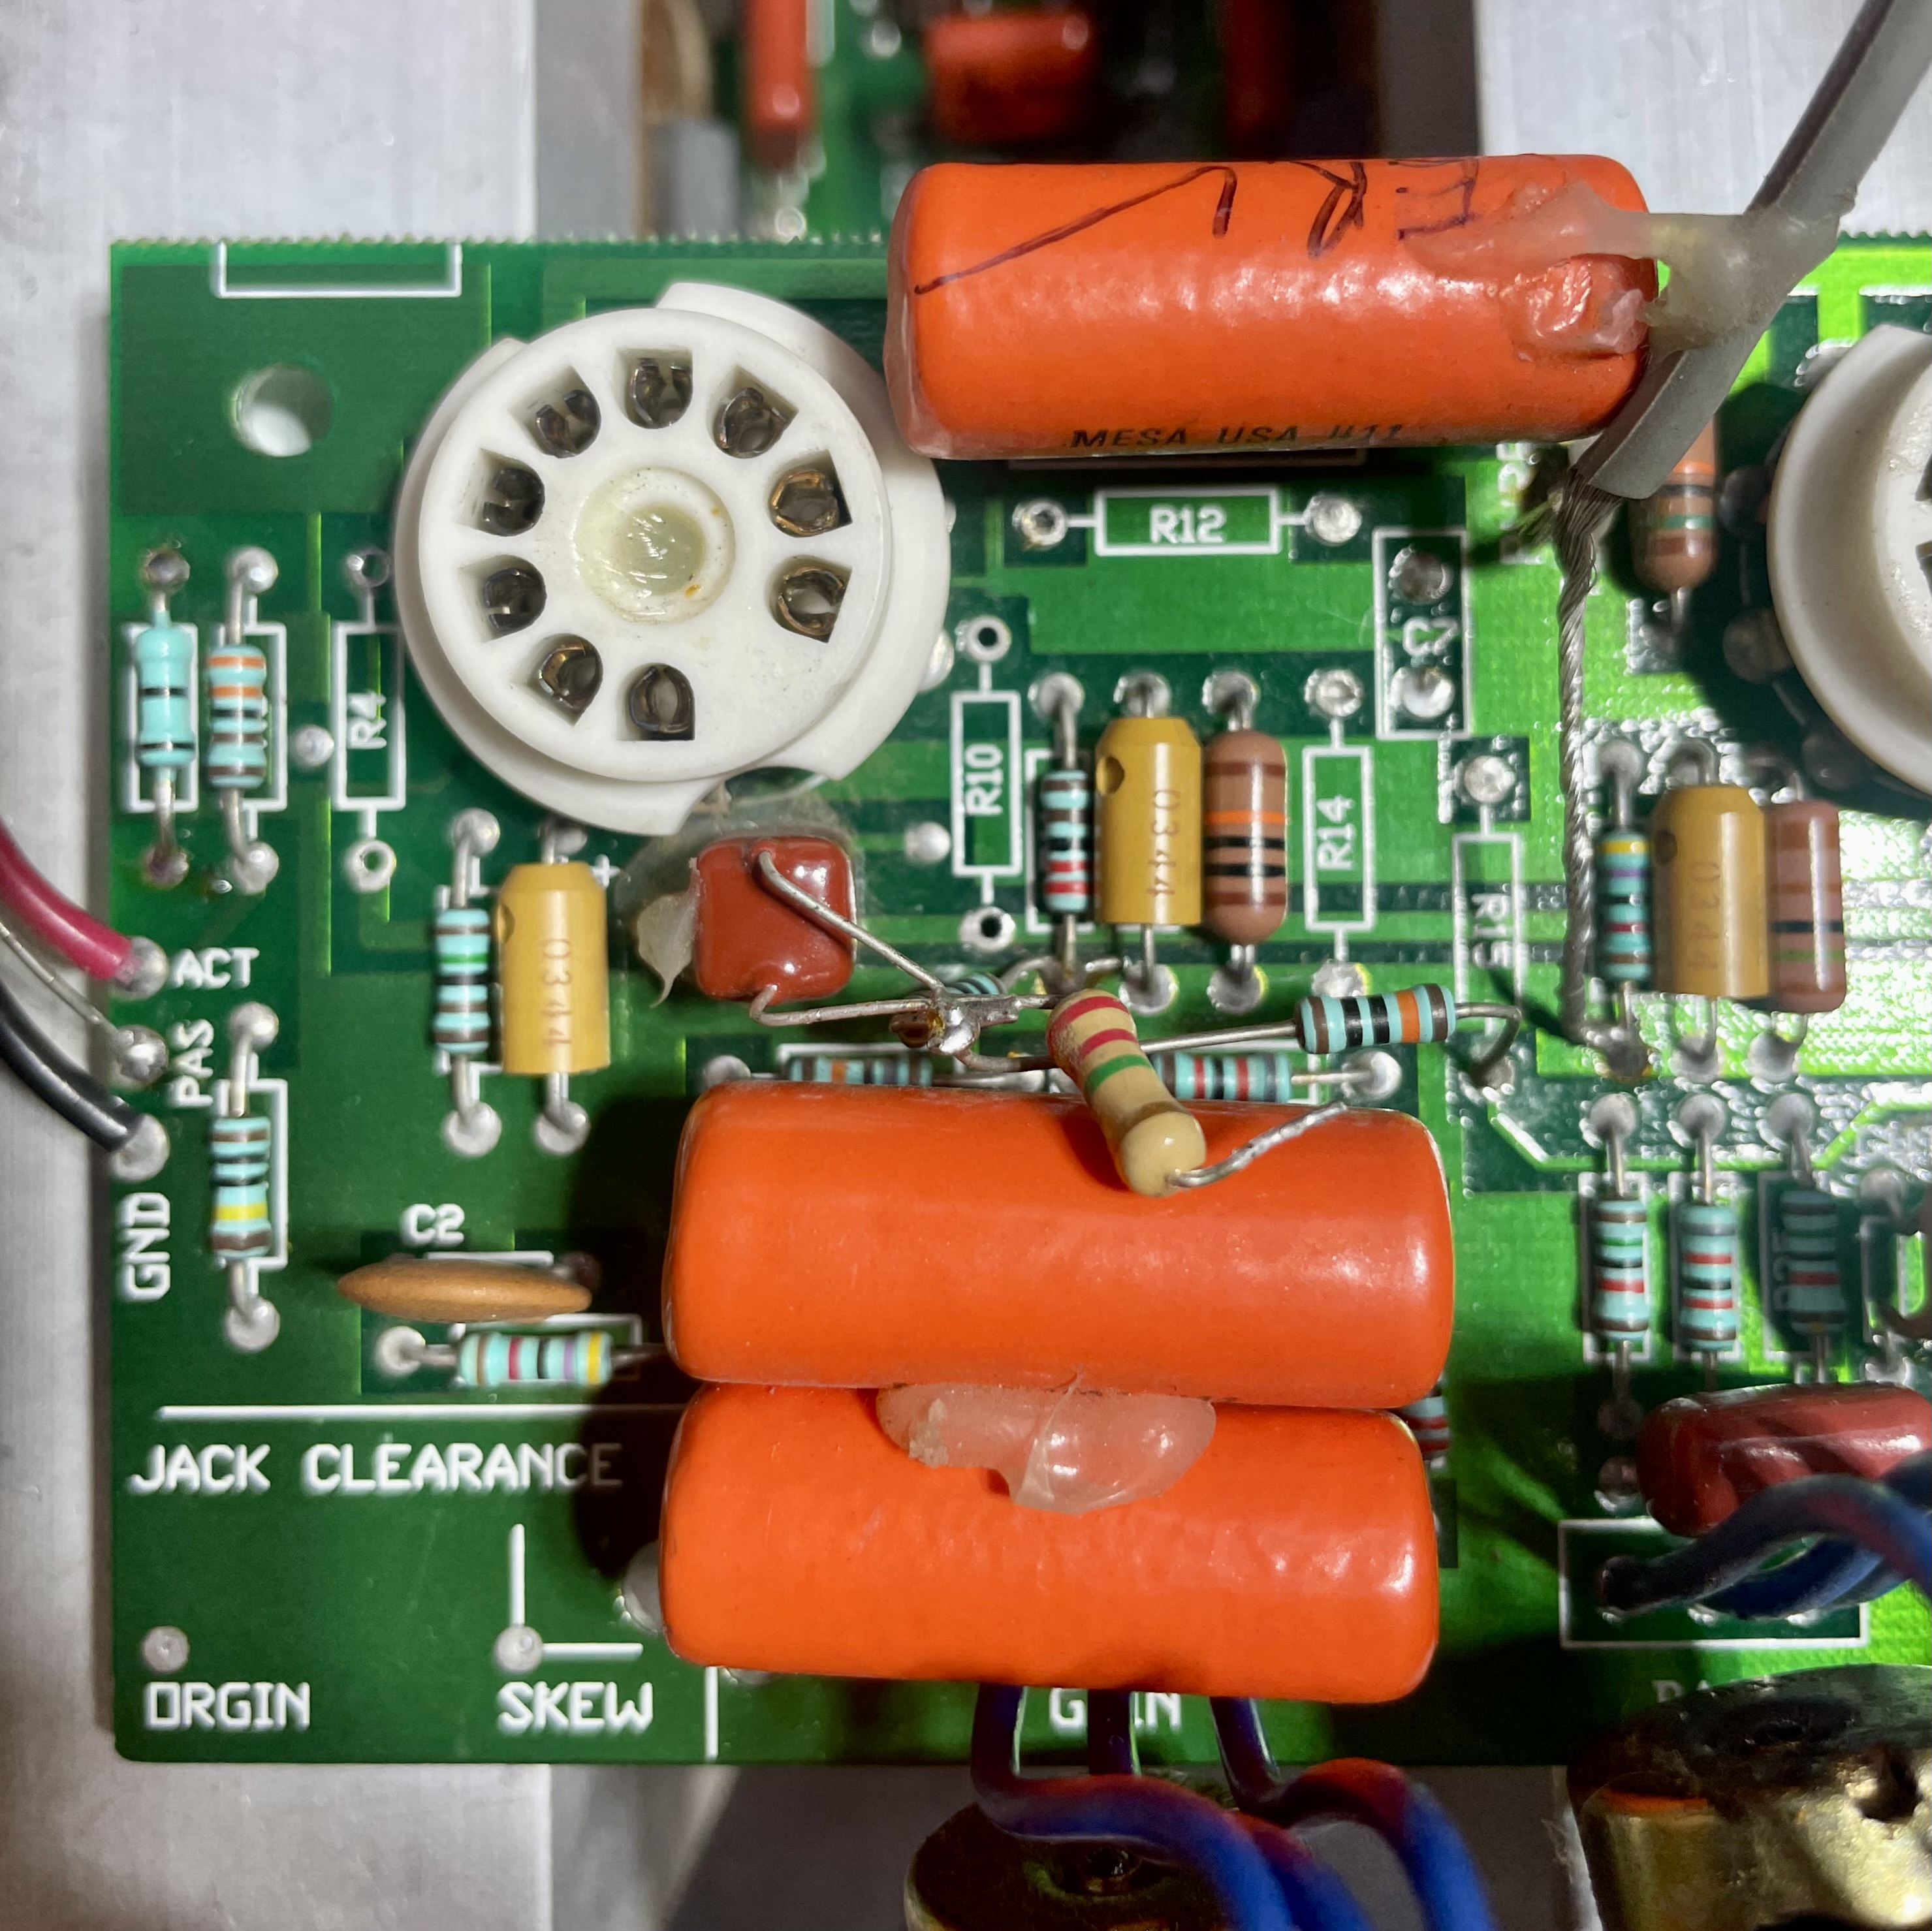
R4 and R10 removed. I had to descretely work around some modded preamp components.
From there, identifying and replacing R4 and R10 was trivial, and took all of about five minutes. I tested, and let the amp run for a few hours and that seemed to do the trick!

R4 and R10 replaced with new carbon film resistors. And the preamp mod has been carefully modded back in.
And of course I took the opportunity to clean two decades of dust, grime and filth-muck off of everything—including the layer of coagulated beer film behind the faceplate (please don’t place drinks on the $3000 coffee table-sized amplifier).